Sourdough Starter
- Yield:200 grams
- Time:6 days, 15 mins show details
The basic idea is to combine water and flour a number of times until naturally present yeast and bacteria reproduce enough to be a very strong leavener.
Ingredients
- 250 gramswhole wheat flour
- 250 gramswater
Equipment
- sealable container, tupperware, glass, or plastic will do


Preparation
- 3 mins
DAY 1
Combine one-fifth of the water and one-fifth of the flour in a small, sealable container. Briefly mix with a spoon until the resulting mixture is hydrated evenly. Seal the container. - 1 day
Leave the mixture at room temperature.
- 3 mins
DAY 2
Add an additional one-fifth of the water and one-fifth of the flour to the container. Briefly mix with a spoon until the resulting mixture is hydrated evenly. Seal the container. - 1 day
Leave the mixture at room temperature.
- 3 mins
DAY 3
Open the container and discard half the starter. From now on, we will always discard half of the starter; otherwise, we would be duplicating the size of the starter indefinitely.Add an additional one-fifth of the water and one-fifth of the flour to the container. Briefly mix with a spoon until the resulting mixture is hydrated evenly. Seal the container.
- 1 day
Leave the mixture at room temperature.
- 3 mins
DAY 4
Repeat instructions for mixing on DAY 3. - 1 day
Leave the mixture at room temperature.
- 3 mins
DAY 5
Repeat instructions for mixing on DAY 3. - 1 day
Leave the mixture at room temperature.
- 1 day
optional
DAY 6
If the starter appears to grow quickly at this point (doubling in 2 or 3 hours), then you're done. If not, you'll need to keep re-feeding daily until the starter is more vigorous. This will vary from kitchen to kitchen. 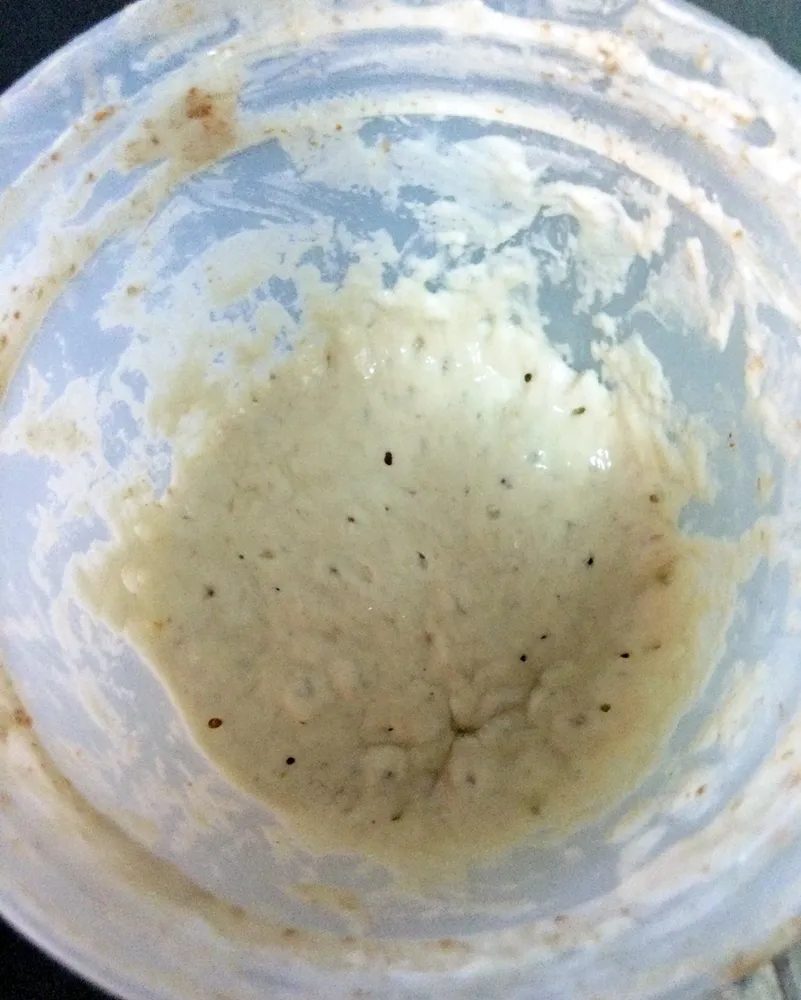
If your starter looks like this a day after feeding, it's ready.
Notes
The process of getting the starter to a point where it's ready for bread-making can vary from several days to more than a week. It will likely progress faster in warmer environments. The times of the feedings can also be managed differently — you could feed it more than once per day if desired, for instance.
Once the starter is mature, it should be fed — as we've done above — on a more-or-less daily basis. Every starter is biologically unique, so try to be attentive to what works for yours.
If you plan on not using the starter for a few days or weeks, it should keep in the refrigerator. Make sure that when you remove it from the refrigerator for use, you feed it and allow it to come up to room temperature a day in advance of use.
Save this recipe to your collection
Sign up free
Discussion